Monday, July 16, 2012

How to Descend Faster and Smoother


Everybody wants to ride faster, smoother and more efficiently. Here’s a few tips on ironing out your descending skills which will make you a faster and smoother rider.

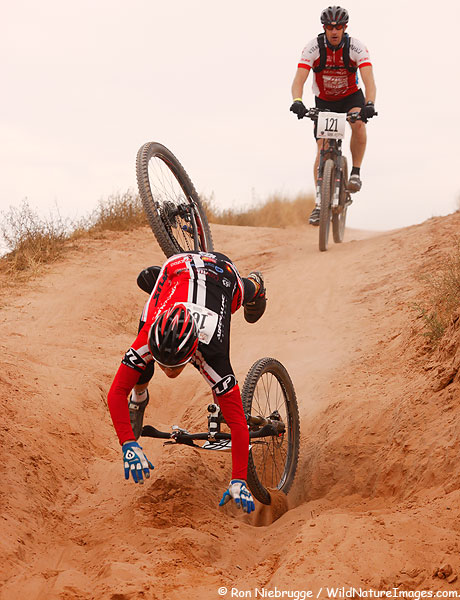
The tendency for many riders is to tense up while riding rough terrain which results in a bumpy ride which is slow, can damage components and can make you fall off the bike. When descending or riding at speed, you want to keep your arms and legs relaxed to soak up all the bumps. No matter how much suspension travel you bike has, you have much more in your arms and legs. Your arms/legs/bike should be fairly active beneath you while your torso remains relatively still and balanced. Riding relaxed is also more efficient and will save you energy. 

If you’re picking up too much speed, instead of riding the brake, try to scrub speed by braking at intervals. You want to brake early so you can roll through a technical section instead of entering the section too fast and skidding through it. This is a much better way to regulate your speed while making it easier to ride smoothly – it is hard to be smooth when you’re on the brakes.

Line selection is especially important when descending. Instead of blindly ploughing through rough sections, you should aim for the smoothest line. As your skills improve, you will be able to smoothly ride rougher and more technical lines and you will find yourself being more creative in your line selection. You also want to consider lines that set you up nicely for corners, jumps, obstacles etc. so it is important that you are always looking further up the trail to see what’s coming.

Thursday, July 12, 2012

How To Pass the MTB Learning Curve

This will be the first post in a series that will help you pass the mountain bike learning curve. I will begin with some posts on improving your skills, then I'll move to tips on keeping your bike running smoothly, then we'll be looking at how improving your physical conditioning will improve your riding.


When you first get hooked on mountain biking, it is easy to become impatient with your progress as you strive to catch up with your fellow riders. Mountain biking is such a great sport because it has so much to offer at so many levels. As a beginner we find ourselves in a new world of awesome dirt while we learn about how fun and rewarding the sport can be. As we improve, we’ve found ourselves developing a new level of fitness and skill that allows us to ride faster and enjoy ourselves even more. The advanced riders among us find pleasure in mastering difficult techniques, riding highly technical terrain and being able to ride at high speeds thanks to a solid foundation of skill and fitness. In my experience that is shared with many others, the deeper you get into the sport of mountain biking and the more you develop as a rider, the more enjoyable it becomes. So if you’ve recently gotten into this great pastime I’ve got some tips that should help you get through that initial learning curve and have you riding faster and smoother in no time. I’ve also got a few pointers regarding care for your bike that will hopefully allow you to prevent learning things the hard way and reduce unnecessary financial costs.

Skills
The main issue riders have when getting started is handling the technical nature of the single track so I thought I’d better start with some mountain bike skills that will open up a whole lot of terrain for you.


A while ago I did a post that explains how playing around on your bike can be valuable in improving your off road skills. I love playing on my bike and still do it a lot. Messing around on your bike in a car park, you backyard or wherever will improve the way you balance, transfer weight and manuver the bike in obscure situations which really is the foundation of mountain bike skills. When playing on your bike try and work on a few of the things listed below:

  • ·         The trackstand – balancing on your bike without moving. Improving your trackstand will directly improve the way you handle technical rock sections, narrow lines and technical climbs. The secret to a trackstand is to gently rock the bike backwards and forwards; you’re not actually completely still in a trackstand. Start out facing up a bit of a gradient and stand up on the pedals while gently applying and removing pressure on the front pedal. This will let you rock gently and help you keep your balance. As you improve, move to a flatter area and try to minimize the amount of backwards and forwards movement. When you think you’ve mastered that, take off one arm or leg.
  • ·         The wheelie – I’m not saying you need to be able to pop a massive wheelie to be considered a good mountain biker, but the ability for you to lift your front wheel on top of or over obstacles will open up a lot of terrain for you. Practice throwing your weight backwards while making a strong pedal stroke to lift up the front wheel. Be careful that you don’t flip backwards – grass is a good place to practice. You also want to practice pulling your front wheel up without peddling which requires you to throw your weight backwards and pull up on the handlebars. Work on climbing up a curb or ledge by lifting your front wheel on top and letting your back wheel gently roll over. If you can get yourself to a point where you can start getting some distance with your wheelies that’s awesome. Try to use the rear brake to stop you from flipping backwards – this will be good for developing brake control.
  • ·         Endoes – aka. Nose stands, front wheelies etc. This is a great exercise in brake control and improving your weight and balance on the bike. To pull an endo you need to slowly roll forward and apply the front brake to lift the front wheel. As you improve, you will be able to pull an endo at higher speeds and travel some distance on your front wheel.
  • ·         Lifting the back wheel – this is useful for climbing or passing over obstacles like logs or big rocks smoothly. You can use lines on the ground to begin practicing this. Work on lifting your front wheel over a line and then lift your rear wheel over by preloading on the pedals and springing up/forward while rolling your handlebars forward and maintaining contact with the pedals. Many riders cheat by tapping the front brake to lift the wheel over and obstacle or relying on their clipless pedals to pull the bike up. The problem with the front break technique is that it is slower and you run the risk of face planting if you jam the break or if your wheel gets stuck on something. The problem with relying on pulling on clipless pedals is when your shoes unexpectedly snap out of the pedals you might find yourself leapfrogging the handlebars.
These are just a few skills that will improve your singletrack riding when practiced regularly. Stay tuned for more posts on improving more MTB skills coming very soon.

Wednesday, July 4, 2012

Danny MacAskill Video

Man I love trials riding. Here's a clip of one of my favorite riders Danny MacAskill.

Saturday, June 30, 2012

Cheap Recovery Drink

So last post I let you in on how to make cheap energy drinks. After a ride, race or workout it is important to start replenishing your body with things that will help you recover. Like energy drinks, there are heaps of expensive protein powders and additives that claim to make you recover faster and better. Many of these products are great, but there are some drawbacks you should look out for. Many protein powders are made in the same factories that banned substances are manufactured so if you are a competitive racer, you may have traces of a banned substance in your system which will get you into trouble. Also, your body can only consume so much protein - excess protein in your diet wont be absorbed into your muscles, you just piss it out which seems like a waste of time. Another drawback is that these protein supplements are often expensive but if you're on a budget, there is an alternative.

Many athletes around the world use full milk as their post workout drink. Milk has a good amount of protein, fat, carbohydrates and sodium which makes it a solid recovery drink. Chocolate milk is also good as it has more sugar than regular milk and will replenish more of your calories. It is important that you have a well rounded diet that provides you with all your daily nutritional needs, but if you feel like your protein intake is lacking, you can mix milk powder with milk to give you a cheap recovery drink with a bit more protein and other nutrients.

Friday, June 29, 2012

DIY Energy

We all want to ride faster and harder for longer. Many competitive bikers resort to expensive energy drink powders and jells but you can get the same effect without the hefty price tag. For rides or races over one hour in duration you should be consuming something to keep your sugars up to prevent bonking - a drop in your sugar levels that impact performance. Drinks and gels are ideal for riding/racing because they are absorbed quickly and wont sit in your stomach like solid food.

One of the easiest recipes is to mix some cordial and add some salt. You may also like to add some table sugar if you think you need a stronger energy kick. The water in the drink will rehydrate you, the sugar in the cordial will raise your energy levels and the salt will help you retain water and replace some of the salts that are lost in through sweat.

Another option is to drink flat Coke for an energy boost. The drink is loaded with sugar and the caffeine will give you that extra kick.

Tuesday, June 26, 2012

Build Strength and Endurance - Goblet Squats

Hi all. The goblet squat is an awesome exercise for building strength and endurance for a cyclist. This is a kinetic chain exercise that requires you to engage your entire core by linking static strength from your upper body with dynamic strength in your legs. This is very beneficial for cyclists who want to increase their peddling power and efficiency while improving posture and preventing lower back fatigue while riding. All you need is a dumbbell or kettlebell(s). Lift the weight so it sits comfortably under your chin, stand with feet slightly beyond shoulder width, and squat down until your knees reach a 90 degree bend. Then repeat. Its super important that your back stays straight throughout the entire movement and your knees stay behind your toes. You should feel this exercise engage your core muscles more as you get deeper into the squat. To build endurance, aim for 15 to 20 reps/set and for power aim for 6 to 10 explosive reps/set.


Monday, June 4, 2012

The Best Way To Train

Hey everybody.

There is so much debate on the best types of exercises and workouts for athletes to achieve their performance goals. Some athletes/coaches swear by weights intensive training programs, others rely purely on riding volume, some rely heavily on dry land workouts and so on. If your browsing articles on fitness I guarantee you'll find a whole range of opinions on the best way to do things. So what's the answer? How should we train?

The answer is everybody is different - we all have different body geometries, lung capacities, muscle densities, natural levels of fast/slow twitch muscle fiber, lactic acid thresholds and a whole heap of other stuff. Because we are all built so differently, what works for one athlete may not work for the next. Its a matter of being in the game for long enough to learn and experience different training methods to find what works for you.

Saturday, June 2, 2012

How To Win The Holeshot

Hi everybody. Been a while since my last post so I thought I'd give you something that you can start incorporating in your training immediately to improve your race starts and help you win you the holeshot. For those who are unfamiliar with the term, the rider who wins the holeshot in a mountain bike race is the one who is the first to enter the singletrack after the start gun. This is an advantageous position to be in as you can control the tempo of the race and you can make ground on the riders who are stuck in the log jam. This is especially useful for short track racers where positioning is everything.

The power step up is an exercise that you can incorporate into your gym workout that develops explosive power through your legs and hips which will transfer into your pedals. All you need is a bench/box/ledge to perform this exercise. The video below explains the power step up well. Make sure you are keeping you knees behind your toes to prevent stress on your patella tendon.


Saturday, June 4, 2011

How To Stay Injury Free

Injury prevention is one of those things that we often neglect when we're healthy but wish we'd done when we're in pain. If you're riding/competing seriously, injury prevention measures should be an important part of your weekly training schedule. Along with preventing injuries, many of these methods also improve performance and could be the missing ingredient in escaping performance plateaus. Below are some methods that will help prevent injuries and increase performance

Stretching

Stretching is the simplest and cheapest way to prevent injuries and should be a staple in your training regimen. Stretching lengthens your muscles which reduces tension on your joints and increases your all-round range of movement which prevents injury and increases efficiency.

Weight Lifting

Lifting weights a few times a week strengthens your muscles and joints which reduces risk of injury. Aim to use free-weights over machines as this will help to stabilize your joints better. Lifting weights also has other more obvious benefits such as increased muscle endurance and power.

Foam Rolling

Foam rollers that can be found at many sport's stores and physio therapy clinics are very useful tools in providing yourself with deep tissue massage. This helps to lengthen muscles while reducing tension in your joints. Foam rolling also increases recovery time and improves bloodflow to your muscles.

Off Season Workouts

It's important to keep fit in the off season if you plan to race in the competitive season. Beginning an intense training and racing season without proper preparation is sure to result in injury. Make use of indoor trainers, weight lifting and cross-training (running, swimming etc.) to keep your muscles and tendons conditioned. The off season is also an ideal time to strengthen your weaknesses which may include speed, endurance or technical skill. A successful off season is vital for a successful competitive season.

Saturday, March 6, 2010

DIY Mud Protection

It doesn't rain much where I live so I don't have to deal with this issue very often. However, it was wet out there the other day and I was hankering for some riding so I decided to construct my own mud protection. The first thing I made is not a new invention but is great for keeping mud out of your face - its pretty popular with downhillers. It has a name starting with "S" and is pronouced something like schnidoof or shnichimut - I know I'm way off so if you know it's actual name please tell me. Essentially it's a piece of old tube that is attached between the fork crown and the arch. Most people attach it with zip-ties but I wanted mine to be removable so I used some velcro strips. When your wheel is spinning at high speed, mud is thrown in front of you which you end up catching with your face; the S-word does a great job of stopping this mud and keeps you much cleaner.


At the rear end of the spectrum I have built a fender from an old milk container and attached it to the top of the seat-stays. I was toying with the idea of having it sit under the saddle like a race fender but thought it might gain better coverage if it were closer to the wheel. Again, you could punch some holes in the plastic and attach it with zip-ties but I used some craft wire that I had lying around.

Sunday, January 24, 2010

Kettlebell Training


Kettlebell training is a fantastic way to build strength specific for mountain biking. This form of exercise will build whole body strength while working your cardio system. there are heaps of resources out there where you can get information on kettlebells and kettlebell training - just run a search in google or YouTube and you'll have an abundance of materials. I found after only a few kettlebell sessions I had increased power and strength which transferred directly into my sport. I put this down not only to muscle adaptation but because kettlebells teach your body to engage your core which is critical in achieving maximum strength and efficiency from your efforts. Kettlebell exercises strengthen your body in a way that is specific to the way you move as opposed to the more unrealistic movements of weights exercises (bench press, arm curls etc.).

Saturday, October 17, 2009

Fixie Video

I've been intrigued by single speeding/fixed gear riding and bikes lately and am pretty keen on building my own fixie from an old-school roadie. Apart from the training benefits that can be achieved from fixed gear riding (strength, peddling technique, leg speed etc.) fixies are just cool. There's a pretty sweet website called My Fixed Gear where people upload images of their bikes - it has some nice creations. I also found this awesome clip on YouTube that really shows what's capable on a fixie! check it!

Sunday, July 5, 2009

Get Stronger Bike Handling Skills - Grip Training

Have you ever come to the end of a long ride or race and could barely grip the handlebars? Your weak hands are not only putting you at greater risk of falling off but are forcing you to ride slower at a time where you need speed the most. Strengthening hour hands/forearms can greatly improve your bike handling skills as you will gain a stronger grasp on the handle bars which will lead to better control when cornering, jumping and riding through the rough. Stronger hands will also mean that you will be able to ride harder and faster for longer because you will be less fatigued as the hours pass. There are a number of ways you can strengthen your grip without expensive hand strengthening gizmos.


Shock Pump/Arm Pump = fatigue in your fore arms derived from absorbing shock when riding down rough trails. To reduce shock pump, take a look at some of the exercises below:


- Chin Ups

All you need here are monkey bars or a chin-up bar. If you don't know what chin-ups are, basically all you do is hang from a bar and lift yourself up until your chin is above the bar, lower yourself then repeat. Lifting your body weight will give your hands a great workout as well as working your lats which are useful when pulling up on the handlebars.


- Just Hang There

If you can't do chin ups just hang on the bar for a while. Start by holding on with both hands and progress to holding with one hand. Run yourself through some timed sets and progressively overload your workouts.


- Tug-of-war

Roll up a towel, grab a friend and get each of you to hold onto either end of the towel with one hand and start tugging! This is a cheap and easy way to start strengthening your hands/fore arms.


Warning

When doing your grip exercises, make sure you don't over train as you will run the risk of Carpal Tunnel syndrome which can be quite painful.
Image courtesy of Steven Michelau

Friday, June 26, 2009

2009 World Mountain Bike Champoinships

That's right, the 2009 MTB Worlds will be held at Mt Stromlo in Australia's capital city, Canberra, which also happens to be my home town! The Success of the World Cup round that was held in August last year should give some insight into what's expected this year. The venue is only a few years old and I know that course preparations are well underway for the event in September.

If you are interested in racing at Mt Stromlo I took a look at the 2009 Australian National Championships not long ago.

Until next time...

Monday, June 15, 2009

The Future Of Mountain Bike Technology

Mountain biking and mountain bike technology has progressed so far since the first fat tyres were introduced - in fact, mountain bike/cycling technology is progressing faster than Formula 1! Back in the day when RoxShox introduced the first mountain bike suspension fork, the whole cycling world thought it was some kind of gimmick that wouldn't last - these days most people are afraid to even think of a world without their suspension. Anyone can agree that the margin between mountain bike technology from the 80's to 2009 is almost incomparable, but even bikes built a few years ago are starting to look a bit retro these days. With the relentless growth of this wonderful pastime and it's multiplying disciplines, mountain bike technology is going to keep progressing whether you like it or not. Here are a few of my predictions for the future of mountain bike technology:

No Derailleurs: gearboxes and single speeding are the next big things. I have noticed an increasing interest in single speeding of late, especially in Australia. The appeal comes from not only low maintenance and simplicity, but has sparked the interest of riders looking for a new challenge where a different kind of fitness and riding style is required. The current economic climate will also see people looking to the single speed side of riding due to its cheapness of purchase (comlete build), conversion kits and maintenance.

I sense that the mountain bike gearbox is about explode onto the mountain biking market. Since the introduction of the GT DHI a few years ago, we now have a number of readily available gearbox options including the Shimano Alfine, Rohloff Hub and Truvativ Hammerschmidt. The benefits I see from these gearbox systems are less risk of snagging your derailleur, quiet operation and instantaneous shifting. Gearbox technology will only improve - soon enough they will be lighter, smoother and cheaper, replacing the seemingly old-school derailleur.

Big Wheels: At the moment wheels bigger than standard 26" seem like a bit of a cult movement but at the rate the technology is progressing and the more commonly available these wheels/bikes are, they are sure to one day replace the 26" standard. I think once the perfect wheel size (29er, 69er, 96er, 650b etc.) and geometry is recognised, I'm sure they will become seen much more regularly on the trails.


Well that's all I've got for now - if I conjure up any more theories based on the future of mountain biking I will keep you posted. until then, YOU HEARD IT HEAR FIRST!

Sunday, March 29, 2009

Mountain Bike Psychology

Lately I've been thinking about the power of the mind and how it can greatly effect our performance. Think about it - if you're feeling flat or depressed, your performance levels are nowhere near that if your motivated and excited. So why don't we spend more time strengthening our mind to drive us into better performance?

Today we will be looking at powerful mind technique which is commonly recognized as imagery or visualisation. Practicing imagery/visualisation has been known to strengthen the pathways between your brain and the rest of your body which can improve your coordination with certain techniques. I can recall numerous skills that I have achieved with imagery/visualisation being a key additive to the technique's success. Imagery/visualisation is a great exercise to improve your ability to ride lines, rail corners, clear jumps and win races.

How To Do It

You can strengthen your brain-body pathways at any opportunity where you are doing nothing; it might be on the bus, in the waiting room or on the loo - but the best time for brain training is probably when you just get into bed at night when it is dark and quiet. Basically all you have to do is visualise yourself doing stuff! Like any training method, you will need to progressively overload your sessions - start with around 5 minutes at a time and gradually build the duration. After a few sessions your imagination ability will improve and so will the quality of your visualisation. Visualise yourself riding tricky lines through single track, clearing jumps you can't yet hit and cornering with precision for starters; you will be able to think of areas you want to improve depending on where you are at with your riding (you may look at riding relaxed and smoothly - floating over the terrain, having good peddling form, riding in a tight bunch etc.). When visualising, make sure you are using good riding technique so it can be converted into reality. It is important that when you are visualising yourself ride, you are looking through your own eyes as if you were riding, not as if you ware watching yourself from a distance.

If you are new to mountain biking or you are unsure on how to tackle a technique, watch videos (youtube) and/or better riders who can execute the skill to see how it is done properly. We can learn a lot from our downhill/free ride brethren so don't rule them out when observing skills.

Imagery Training On-The-Go

One thing I do a fair bit of is picking lines on any remotely rideable thing. If I'm walking down a staircase I'll visualise myself riding down the stairs. If I see an open rock face I will plan the best route to the bottom. Even if it is unlikely that I will be facing any of these obstacles in a single track situation, similar hazards on a smaller scale are sure to arise and I am able to attack them with more confidence because I have already pre-planned a bigger stunt.


Stay tuned for more psychology techniques to improve your riding, coming soon...

Wednesday, January 28, 2009

2009 National MTB Championships

Last weekend (January 23/26) saw the 2009 MTBA National Mountain Bike Championships held at Mt. Stromlo, Canberra. I was unfortunate enough to miss competing myself but I was able to get a glimpse of the short-course racing that was held on Monday. The course was relatively long with the odd short-sharp climb accompanied by a few jumps and tight bermed corners. The riding was hot being held at the height of a 38 degrees Celsius (100.4 F) day. The track was broken in by the Sport Men division where a strong riding standard was set, followed by the massive swarm U19 Male competitors. The Women's short course was next where a strong lineup of riders made there presence felt. The elite men finished the series of racing off with a high-paced dust fight. Olympian Chris Jongewarrd took the whole-shot and gave himself a big 15 second buffer and rode alone for most of the race. After working well together, local rider Dylan Cooper and Victorian Daniel McConnel managed to pull Jongewarrd's lead back to a manageable distance for an exciting finish with Jongewarrd in 1st, Cooper in 2nd and McConnel in 3rd.


For more information on the event and venue visit http://www.mtbnationals.com.au/ and stromloforestpark.com.au

Tuesday, January 13, 2009

Which Gear?

Our drive train can handle whatever gear combination we plug in right? WRONG! It is imperative that we know how to work with our drive train to prevent unnecessary wear and expensive damage; not to mention performance advantages.


Don't Cross Your Chain


Your chain has been crossed when you are in the big chainring at the front and a big chainring at the back (eg. 3x1), or the small chainring at the front and a small chainring at the back (eg. 1x9). Riding in these sort of gear ratios puts extra strain on your chain which can lead to premature chain/cog wear and most likely a snapped chain.


When shifting you should always be wary of the ratio you are in. When you are in the middle ring upfront you can use most of the range in your rear cassette but your drive train may struggle with the smallest and biggest few cogs at the rear. When in the smallest (easiest) chainring upfront you don't want to exceed the inner half of the rear cassette which contains the larger (easier) cogs. The same principle applies when in the big (hardest) chainring upfront - stick to the smaller (harder) gears at the back. The straighter the line of your chain, the less strain it is under.

Monday, December 8, 2008

Injury Management

Injured? I've found this great article on ice therapy written by Sports Massage Therapist Laurel J. Freeman from the Road Runners Club of America:


Ice Therapy by Laurel J. Freeman

Ice, anyone? Ice isn't just for cold drinks. In the past eight to 10 years, many studies have shown the benefits of ice as therapy. Here are the answers to some common ice-related questions.

What does ice do?
Ice is one of the simplest, safest, and most effective self care techniques for injury, pain, or discomfort in muscles and joints. Ice will decrease muscle spasms, pain, and inflammation to bone and soft tissue. You can use ice initially at the site of discomfort, pain, or injury. You can also apply ice in later stages for rehabilitation of injuries or chronic (long-term) problems.
During an initial injury, tissue damage can cause uncontrolled swelling. This swelling can increase the damage of the initial injury and delay the healing time. If you use ice immediately, you will reduce the amount of swelling. Ice decreases all of these: swelling, tissue damage, blood clot formation, inflammation, muscle spasms, and pain. At the same time, the ice enhances the flow of nutrients into the area, aids in the removal of metabolites (waste products), increases strength, and promotes healing. This "ice effect" is not related to age, sex, or circumference of the injured area.

Four stages in ice therapy
There are four official stages to ice. The first stage is cold, the second is burning/pricking, the third stage is aching, which can sometimes hurt worse than the pain. The fourth and most important stage is numbness. As soon as this stage is achieved, remove the ice. Time duration depends upon body weight. Twenty to thirty minutes should be the maximum time per area. If it is necessary to reapply ice, let the skin go to normal temperature or go back to the third stage of aching.

How does ice therapy work?
Ice initially constricts local blood vessels and decreases tissue temperature. This constriction decreases blood flow and cell metabolism, which can limit hemorrhage and cell death in an acute traumatic injury. After approximately 20 minutes of ice, blood vessels in the injured area then dilate (open) slowly, increasing the tissue temperature, an effect which is termed "reactive vasodilation." A study reported in the Journal of Orthopedic Sports Physical Therapy, (Jul/Aug, 1994), found that, despite the reactive vasodilation, there was a significant sustained reduction in local blood volume after ice was applied.

What does this mean for me?
It can mean a lot, if you are injured or in discomfort! Ice therapy can help the area heal faster, and there will be a decrease in pain and swelling and an increase in lymphatic drainage.
Why ice after a workout?In the past 28 years, there have been many studies of ice as a therapy tool for injuries. Many of these studies have had conflicting conclusions, but improvements in technology are giving researchers new data. There is no doubt in the minds of many researchers and doctors that ice is the most widely used and efficient form of cryotherapy in medicine today. A 1994 study sited in The American Journal of Sports Medicine (Jul/Aug) showed ice affects not only the arterial and soft tissue blood flow, but also the metabolism of the bone, in a positive way. This is significant in the healing process of an injury to a joint.

When should I use ice?
For the greatest benefits, use ice after exercise and not before. In the Journal of Sport Rehabilitation (Feb/1994), a study on the ankle was conducted to see if ice should be used on an injury before exercise. The finding showed decreased temperature reduces the joint mechanoreceptor sensitivity and thereby alters joint position sense, exposing the joint to possible injury. In conclusion, cooling a body part prior to athletic performance is contraindicated, which is academic-speak for "probably a bad idea."
It was once believed the use of ice was only beneficial in the first 24 hours after an injury. Recent scientific studies have shown the benefits of ice over the long term. During the initial stage of an acute injury (within 24-48 hours), or during the chronic stage (after 48 hours) ice can be very beneficial in promoting wellness.

Can I ice as a precaution?
You can use ice immediately following any workout, discomfort, or injury. If the swelling or pain does not decrease within a reasonable time (24 to 48 hours), consult a physician.
Is ice safe?Ice therapy is very safe when used within the treatment time recommended. Don't use ice if you have the following conditions: rheumatoid arthritis, Raynaud's Syndrome, cold allergic conditions, paralysis, or areas of impaired sensation. Do not use ice directly over superficial nerve areas. In a study printed in the Archives of Physical Medical Rehabilitation (Jan/1994), the use of ice was tested on spinal cord-injured and able-bodied men. The results were that ice and cooling down the body temperature may evoke a vascular response to cold stimulus that may be mediated in part by the spinal cord and by supra-spinal centers causing a change in blood pressure.

How should ice be used in conjunction with exercise?Ice can be combined with movement. Once the fourth stage of icing has been achieved, numbness, gentle range of motion and isometric exercises can begin. These movements should be painless, stressing circular, spiral, and diagonal movements. Once the numbness has worn off, re-ice and exercise again. This can be done two or three times a day. Ice can cause changes in the collagen fibers of the muscle. Strenuous exercise is a bad idea during an ice treatment, as this can result in further damage to the injury.

How does Ice combine with other therapies?
In March of 1995, an interesting study was conducted on the use of ice and ultrasound. Ultrasound is an instrument used in assisting the healing process to damaged tissue. The study found if ultrasound was followed by a five-minute application of ice, the muscle significantly increased in size. When ice was applied first followed by ultrasound, there was little or no change in the muscle fibers. One of the important conclusions of this study is after exercising, take a shower first, before applying ice, to receive the maximum benefits.

What is R.I.C.E.?
When there is an injury or discomfort, a good rule to follow for first aid is the mnemonic RICE:

R - Rest the injury.
I - Ice the injury.
C - Compress the injury.
E - Elevate the injury above your heart.

Three Icing Techniques
Ice is the easiest tool to use in rehabilitation. It is inexpensive and very effective. The most widely used is the ice pack. To make an ice pack, put ice (crushed is great) in a plastic bag, push out all the air and fasten the bag.

If another bag is available, place the fastened one inside to help prevent leaking. Put a paper towel on the site of the injury or discomfort, and then place the ice pack over the paper towel. This will prevent freezer burn to the skin. If a regular towel is used, the ice pack will not get the skin cold enough to have the physiological effects occur. If the injury is in the neck, back, or shoulder, an ice pack can be put under a T-shirt or blouse. A person can then keep this on while working. Ice packs are also convenient when resting. Ice packs can be used on legs or arms. There are many types of ice packs on the market. If purchasing one, make sure it will get sufficiently cold to achieve the four stages of icing. The second most used method is ice massage or ice cups. Place water into a styrofoam/paper cup and freeze it. Place a towel under the area with discomfort or pain to catch drips. Holding onto the cup, tear the edge around the cup, exposing the ice. Use a gentle, continuous, circular motion and rub the ice directly over the skin at the site of injury or discomfort. This is good for areas on the extremities such as knees, legs, ankles, arms, wrists, hands, and so on. Ice cups penetrate deep into the muscle fibers. Because this is an active motion, it can sometimes be more effective than an ice pack. The desired effect is to go through the four stages of ice, as stated above, before moving to another area, approximately 5-10 minutes. There are some reusable plastic ice cups on the market, for the environmentally minded; however, paper or styrofoam cups work fine.

The third method is the ice bath. Find a bucket or container large enough to immerse the area in need. Place a towel under the bucket and add ice. Try to isolate the body part that needs to be iced. Immerse your foot for 5 to 10 minutes (20 minutes maximum). Do not immerse your whole body in ice - doing so can cause shock and/or possibly a heart attack. Laurel J. Freeman, B.A., a nationally certified sports massage therapist in Florida, has worked on many world-class athletes and has given numerous lectures in health related field. She developed, teaches, and practices Reprogramming Neuromuscular Responses @ (RNR). Laurel is a member of the Florida Track Club.


This article was found at http://www.rrca.org/resources/articles/ice.html

Monday, November 24, 2008

Mountain Biking Is The Healthiest Sport.


  1. It makes you fit. When you mountain bike you use and develop both aerobic and anaerobic systems. Regularly participating in mountain biking improves your physical endurance and increases your fat burning capabilities which will result in more energy both on and off the bike.
  2. Cycling strengthens your heart, making it more efficient resulting in improved physical performance in both sport, recreation and general living.
  3. Mountain biking is great for your lungs. Cycling in the wilderness around trees forces you to fill your lungs with clean, fresh and non-polluted oxygen which will flow through your bloodstream, clearing toxins and making you fell great.
  4. Mountain biking is a low impact sport. Mountain biking takes care of your joints by being a low impact sport. There is no pounding associated with peddling which is good for preventing injuries both acute and long term.
  5. Mountain biking builds your immune system. Just like when you were a kid, playing in the dirt helps to strengthen your immune system by exposing yourself to different kinds of bugs. A stronger immune system means you won't get sick as often and you will recover quicker from any illnesses you may get.
  6. Mountain biking develops your sense of balance. Having a better sense of balance helps to prevent injuries while also improving your general coordination.
  7. Mountain biking improves your reaction time. Flying down a trail at 40km/h and you come across a nasty rock section surrounded by trees, you need to pick you line FAST, otherwise you may be eating the dirt pretty soon. Other examples may include reacting to varying trail surfaces, that giant root sticking out at the end of the blind corner or reacting to the unpredictable actions of other riders.
  8. Mountain biking makes you smarter. Cycling circulates vital fluid around your body pumping it through your muscles and through your brain. Better circulation to your muscles = better muscles so better circulation to your brain = better brain.
  9. Mountain biking makes you better at mechanics. Repairing or tinkering with your bike improves your awareness of how things work like wheels, bearings, springs etc. The more exposure you've had with the parts on your bike, the handier your repair skills may become
  10. Mountain biking is a social sport. Cycling can also maintain your social health where you can easily link up with some of the friendly mountain bikers of the world.
  11. Mountain biking is fun! Any outdoor physical activity that you enjoy and want to do more of is the best thing to keep happy and healthy.